Some of my favorite projects are the very simplest.
I recently pinned a photo to
my very small "Neat Ideas" board, showing how to spruce up a simple hairband with a button. I went to my button collection, and pulled every one that had a shank on the back (the little loop, as opposed to buttons that are flat, and have holes in the middle). Then I had to narrow it down to the shanks with a big enough opening to thread a hairband through. With one simple move (illustrated in the Pinterest pin and
the Dream Patch post), I had a collection of much fancier hairbands for my girls.
Here is a closer look at some of these simple new creations:
 |
| One of my favorites for the girls. |
 |
| I'm thinking this one might make it into my 'do. |
 |
| Pretty with any color band. |
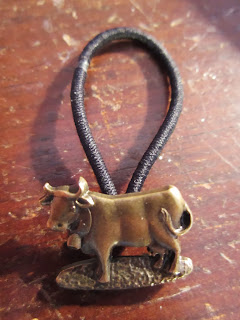 |
| What? You don't have a cow button? |
So, clearly for this project, you need pretty, fun or funky shank buttons, with
large loops on the back. I used an awl more than once to help poke the hairbands through. (An awl is the pointy tool used in bookbinding.) It also helps to have pretty colored hairbands to match to your buttons.
The woman at Dream Patch points out in her blog post that you can spruce up hairpins using the same technique, just sliding the pin through the button shank. Simple brilliance!
Somehow, then, I found myself on
My Paper Crane, where Heidi made her
own fabric-covered
buttons to turn into hairband embellishments. I remembered immediately that I had a button kit tucked away that I had been wanting to use, so I dug it out, along with fabric scraps collected from my kids' discarded clothing, and got to work making my own buttons for creating fancy hairbands.
The process is simple, because I just followed the directions for the kit.
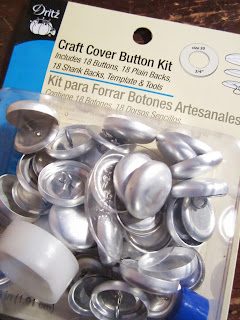 |
| This kit makes smaller-sized buttons than the ones I am showing here. I have to admit that once I made all ten larger-sized buttons, I ran out to JoAnn and bought a second kit for smaller-sized buttons to play with! |
The kits provides you with a template, and tells you to draw around the circle onto your chosen fabric.
After you cut out the circle, you lay it face-down on one of the plastic pieces they provide. Then you lay what will be the front of the button on top of it and press down.
For the next step, you tuck all the edges of the fabric inside, and press the back of the button (with the shank attacked) down on that. This step can take a little effort, depending on how thick your fabric is! I couldn't get denim to work at all.
You then just pop out and admire your fancy new button!
Of course, Mommy can't experiment with any new craft without little fingers bursting in and demanding to participate! Both my four- and five-year old were able to make two buttons apiece with just a little bit of Mommy aid:
And they happily wore some new button creations for the rest of the day:
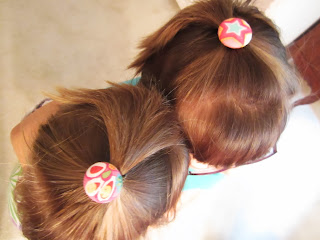 |
| Aerial view! |
I'm not sure that we need quite as many button hairbands as I am likely to create buttons for, so I imagine I will end up with a jar of brightly decorative buttons on a shelf in my craft room before this fabric button-covering craze passes!


3 comments:
This is very clever and very cute. I love the cow button.
Simple yet adds some interest and they go with various outfits. Good idea.
What a good idea! The girls are going to have fun deciding which ones to wear. You had a lot better luck covering the button molds than I ever do -- I gave up years ago!
Post a Comment